Installing Git and GitLab on a Linux Server
As I said in my previous post, I am building a development environment. The starting point with any development environment is source control. I am going to use Git with GitLab as a UI over it. I’ll be installing it on a Ubuntu server.
First Steps: The Git basic setup
First, get your hands on a Linux server. Once you have it, log in as an unprivileged user and set up Git (taken from here and here), using the following commands:
Update system and install git:
sudo apt update (update apt cache)

sudo apt upgrade (upgrade to latest packages)

sudo apt install git (likely already installed)

sudo reboot (for good measure)
Now we set up the git user for the server
which git-shell (this will tell you the path to the Git shell)

sudo vi /etc/shells
add /usr/bin/git-shell (or the output of the which command) to it.
Now add a user for git to run as:
sudo adduser --disabled-password git

when prompted, leave fields blank
Next we set up the Git user – this user is used to commit files and will not have a shell or password, and will use authorized keys to send work to the server. We won’t be using it, however, since we’ll use GitLab, which communicates over http.
sudo su git

cd

mkdir ~/.ssh && chmod 700 ~/.ssh

touch ~/.ssh/authorized_keys && chmod 600 ~/.ssh/authorized_keys

vi ~/.ssh/authorized_keys
Copy your public key into the authorized_keys file. Again, not needed for GitLab, but needed to use git directly, as I mentioned above.
Then exit the git user’s shell and lock them out by setting their shell to the git shell. Since this user has neither a password not a shell, they can’t log in directly, even with a key.
exit

sudo chsh git -s $(which git-shell)
Once that is done, you can test whether git works:
cd /home/git

sudo mkdir test_app_1.git

cd test_app_1.git/

sudo chown -R git.git test_app_1.git/

sudo git init --bare && cd ..
This should output a successful git setup.
GitLab setup
Next, we will install GitLab (instructions copied from here)
Firs, install dependencies:
sudo apt install ca-certificates curl openssh-server postfix
(for the postfix setup – I think internet site is what you want (it will want to send messages out), which we may set up later. For now, we won’t be setting up email integration, so any choice is fine.
Now, navigate to the temp folder, install the repository for GitLab, and then install GitLab itself:
cd /tmp

sudo curl -LO https://packages.gitlab.com/install/repositories/gitlab/gitlab-ce/script.deb.sh

sudo bash /tmp/script.deb.sh

sudo apt install gitlab-ce
Then configure GitLab by editing its config file and setting the URL – that’s all you need.
sudo vi /etc/gitlab/gitlab.rb
Set external_url to the external DNS name you set up for your host with your hosting provider. You’ll want to use the hosts file editor to set the internal IP address mappings on servers on your dev network that need to access it. So, if your Git/GitLab server is internally 10.0.0.8, you will need a hosts entry that contains something like:
10.0.0.8 gitserver.eastus.cloudapp.azure.com
I didn’t use https since it’s not worth the trouble in this situation, since LetsEncrypt requires certain gymnastics to get to work, and since this system will not be on all the time, it won’t be able to get new certificates.
Once you have set the external_url, run:
sudo gitlab-ctl reconfigure
Now, you can chill for a while while it sets up GitLab.
After it was done I rebooted once more for good measure.
At this point, you have a git server you can reach on port 22, but no means of accessing your GitLab instance. This is where the dev VM comes in. Since we’re cutting corners on security, we’ll only accessing the GitLab ui and data over http locally in the cloud network. I would not recommend opening port 80 to this server.
So spin up a VM (where you’ll be doing your work). You’ll want the following software installed:
- Visual Studio Community Edition
- Hosts File Editor
- Git for Windows
- The GitLab Extension for Visual Studio (Optional if you want to experiment, but I don’t recommend it)
On your Dev computer, use Host File Editor to give an alias to the Git machine using the domain name you specified in gitlab.rb:
gitserver.eastus.cloudapp.azure.com maps to 10.0.0.8
Open a browser and navigate to: http://gitserver.eastus.cloudapp.azure.com

And you’ll get a GitLab page! So use your password manager to generate a secure password, and enter it and you’re up and running!
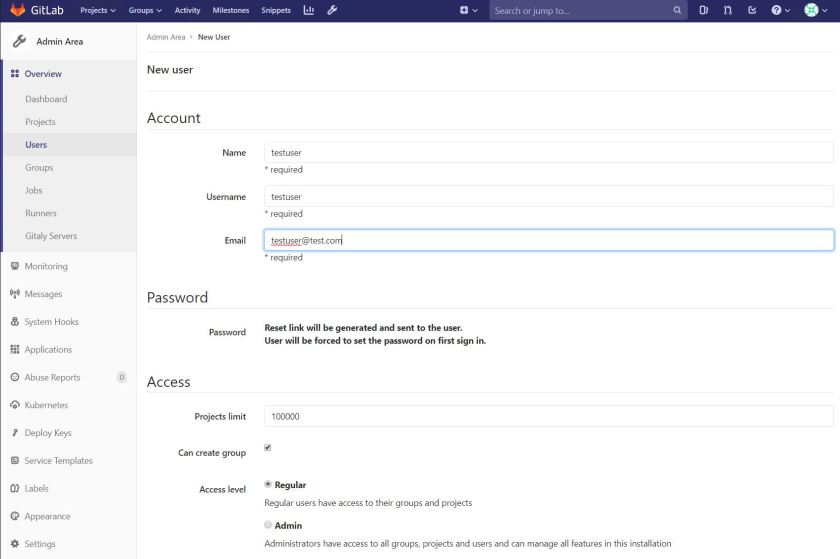
Now you’re ready to rock. Log in with username ‘root’ and the password you created, and click the wrench in the toolbar to open the admin area. Click Users in the left menu, then click the green new user button and create your user account (you probably don’t want to be using the root user).
Now, create your new user. Since we didn’t set up smtp mail, you’ll want to set a first password. Then, log in as that user and change the password (again using a password manager to generate a strong password). Now you’re ready to check in code!

Checking in some code (the first, bad way)
Open visual studio and create a project, any project.

Right-click the solution and click ‘Add Solution to Source Control’:

This will create your local Git Repository. You will see that it worked in the Output pane under: Source Control -Git:

Now you can experiment with changes and local commits. Once you are happy with the commits, it’s time to push this to your GitLab server.
In order to sync with GitLab, the first thing I tried was the GitLab Extension.
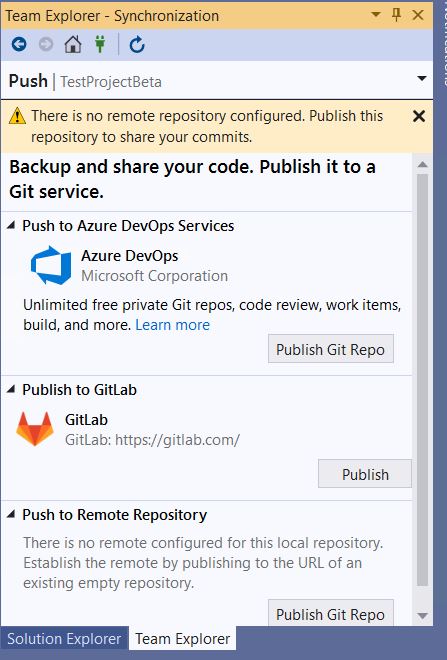
The problem is that the ‘Sync’ pane has a ‘Publish to GitLab’ area that made me think that it could only publish to https://gitlab.com/:

The first time you try to commit and sync:

It will get upset and show this:

So click ‘publish’.

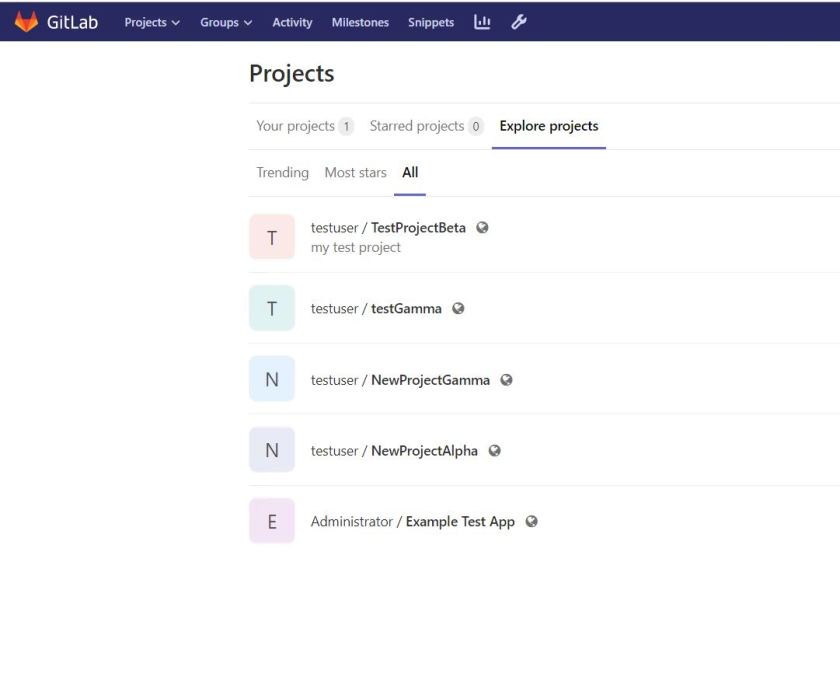
The first time you do it it will prompt for a server and credentials, then it will push to GitLab and set up the project:

As you can see, this worked. However, I can’t for the life of me figure out how to change the server or password, but it’s a start.
It turns out that this extension is sort of dubious, so I went back to this and tried to figure out a better, more sensible way to do this.
Using Git Native Mode With GitLab
So here is what works better. GitLab can also access its repository over http but appending ‘.git’ to the url of your project. To use this approach, create your solution and add to source control, as above.
Using your Test User, Create a project with the same name as your Solution (or another, it doesn’t really matter).

Copy the Project URL to the clipboard:
http://bghgitexample.eastus.cloudapp.azure.com/testuser/testprojecteta2
In VS, go to the Team Explorer, Click ‘Home’ (the house) and choose Settings, then ‘Repository Settings’. Then, in the ‘Remotes’ section, click ‘Add’.
In the Dialog Box that appears, past in the Project URL, and append ‘.git’ to it.
http://bghgitexample.eastus.cloudapp.azure.com/testuser/testprojecteta2.git

Now, in the lower pane, switch to the Package Manager Console (we’re using it just for the convenient PowerShell Console) and enter:
git push --set-upstream TestProjectEta master
This will return a weird that only occurs because we’re using the PowerShell in VS (you can run it in the developer powershell to not show it) but it will then connect your local repository to the project repository .

Now you can go to Team Explorer -> Home -> Sync and all the Actions are working:

The method overcomes the weirdness of the GitLab Extension and gives you a bit of the best of both worlds, it seems.
What I’m listening to as I do this: MC Frontalot’s Nerdcore Rising. A classic of the Nerdcore genre, he’s got some great songs on here. I’ll give Weird Al credit for really the first Nerdcore songs (All about the Pentiums), it really came into being in the early aughts with MC Chris, Optimus Rhyme, and Frontalot.


